Galations 5:22

But the fruit of the spirit is love, joy, peace, patience, kindness, goodness,
faithfulness, gentleness, and self-control.

Galations 5:22

Looking for the TUESDAY TO DO PARTY?

The Blackberry Vine
CLICK PICTURES FOR CURRENT PARTY

Monday, September 27, 2010

Boo & Burlap Halloween Wreath

COME CHECK OUT
I'd love for you to share one of your pretties!
~-~-~-~-~-~-~-~-~-~-~-~-~-~-~-~-~-~-~-~-~-~
Please show some grace with these photos.  My SLR camera is out of commission for now (a little moisture at a soccer game can cause BIG problems...so my old, trusty point & shoot will have to do for now.)
To make the wreath I used a large grapevine wreath, orange burlap, black burlap, thick chip board letters, scrap paper, mod podge, modeling paste, acrylic paint & ribbon.
 Its pretty self-explanatory, but just in case...you cut the burlap into strips and double knot around the wreath. 
The chip board was painted with black acrylic paint then scrap paper was added with mod podge.  Some texture was added with modeling paste.  The letters were aged and the textured defined by a thin wash of black and burnt umber paint.
Finally, simply tie the letters on with ribbon.

I'm not sure this wreath is complete, but its better than what has been up there for the last few weeks....nada.
Happy Fall!
Smiles!

Don't forget to come back October 3rd thru October 9th for the Pretty Packages Party!


The Blackberry Vine


Linking to these parties:
Market Yourself Monday with Sumo's Sweet Stuff , Just Something I Whipped Up with The Girl Creative Party Blog , Motivate Me Monday with Keeping It Simple , M.M.M. with C.R.A.F.T. , Making the World Cuter Monday , Craft Envy Saturday Spotlight
SYS ThursPhotobucket

Sunday, September 26, 2010

State Fair of Texas

 Its that time of year again.  The State Fair of Texas opened this weekend!  I can't wait til we get to go!  (I'm slightly jealous of all those lucky ones that were able to take advantage of the glorious weather today!)  I found a few pictures through the last few years that I really loved.  Be sure to see how the little boy at the end has grown in two years!  Oh, it really does fly by.

2008

2008

2009
2007
2009

Don't forget to come back October 3rd thru October 9th for the Pretty Packages Party!


The Blackberry Vine

Saturday, September 25, 2010

Coconut Almond Cake

~Coconut Almond Cake~

Ok, so its not the most professional of pictures (taken p.b.; pre-blog,) but you get the gist of what the cake will look like.  Its a beautiful cake in person.  It looks especially striking on my Mem-maw's Fostoria cake stand.

I made this cake for the first time at Thanksgiving several years back.  We had lots of friends and family get together and everyone gave it a thumbs up.  (I like to try new recipes when there's a crowd.  You get an honest review by how much is left over!) 

This isn't a quickie dessert.  I make the cakes ahead of time, wrap them well in saran wrap and freezer bags,  and store them in the freezer.  To help the cakes retain their shape in my FULL freezers, I put them back in their pans after the saran wrap.  This way you won't end up with a big dent somewhere on your cake that you have to "fix" with extra frosting!

The filling also needs to be made ahead of time.  The day before you are going to serve it, you can put the cake together with the filling and put back into the fridge.  I like my cream cheese type frostings to be fresh.  Make it the day you plan to serve it.  Frost and garnish your cake, then leave it out long enough for the layers to thaw.  Cakes are best at room temperature so you can fully taste all of the components and textures.

So, for your next special occasion, I hope you'll give this cake a try.  Your friends and family will adore you for it!

2 cups sweetened flaked coconut
1/2 cup sliced almonds
parchment paper
3 1/2 cups all-purpose flour
1 Tablespoon baking powder
1/2 teaspoon salt
1 1/2 cups unsalted butter, at room temperature
1 1/4 cups granulated sugar
1 cup firmly packed light brown sugar
5 large eggs, at room temperature
1 cup whipping cream, at room temperature
1/3 cup coconut milk
1 Tablespoon vanilla extract
1 Tablespoon almond extract
Coconut-Almond Filling
Coconut-Cream Cheese Frosting


  1. Preheat oven to 325 degrees.  Bake coconut in a single layer in a shallow pan 6 minutes.  Place almonds in a single layer in another shallow pan; bake, with coconut 7 to 9 minutes until almonds are fragrant and coconut is lightly browned, stirring occasionally.  (Stay by oven during this time.  If you can smell your almonds away from the oven, they're probably too brown.  They can go from PERFECT to unusable very quickly!)

  2. Line 3 (9-inch) round cake pans with parchment paper.  Grease and flour paper.

  3. Sift together flour, baking powder, and salt in a very large bowl.

  4. Beat butter at medium speed with a heavy-duty electric stand mixer until creamy; gradually add sugars, beating until blended.  Beat 8 minutes or until fluffy, scraping bottom and sides of bowl as needed.  Add eggs, 1 at a time, beating well after each addition (about 30 seconds per egg.)  Stir in whipping cream and next 3 ingredients.

  5. Gently fold butter mixture into flour mixture, in batches, just until combined.  Pour batter into prepared pans.

  6. Bake at 325 degrees for 30 to 32 minutes or until a wooden pick inserted in center comes out clean.  Cool in pans on wire racks 10 minutes; remove from pans to wire racks, and cool completely (about 1 hour.)  (This is the point where you can wrap the layers and place in freezer.  It is absolutely crucial that the cakes are COMPLETELY cool before placing in freezer.)  When ready to finish putting cake together, continue on to step 7.)

  7. Place 1 cake layer (no need to thaw first if frozen,) on a serving plate.  Spread half of chilled Coconut-Almond Filling (recipe follows) over cake layer.  Top with 1 layer, pressing down gently.  Repeat procedure with remaining half of Coconut-Almond Filling and remaining layer.  (Again, this is the point where you can wrap the entire cake and place in refrigerator.)  (On the day you plan to serve cake, finish with step 8.)

  8. Gently spread Coconut-Cream Cheese Frosting on top and sides of cake.  Press toasted coconut onto sides of cake;  sprinkle toasted almonds on top.
This cake serves 12 very generous servings. 
(It would easily serve 18.)
ENJOY!!

Coconut-Almond Filling
2 Tablespoons cornstarch
1 teaspoon almond extract
1 1/4 cups whipping cream
1/2 cup firmly packed light brown sugar
1/2 cup unsalted butter
2 1/4 cups loosely packed sweetened flaked coconut
1/4 cup sour cream

  1. Stir together cornstarch, almond extract, and 2 Tbsp. water in a bowl.

  2. Bring whipping cream, brown sugar and butter to a boil in a saucepan over medium heat.  Remove from heat, and immediately whisk in cornstarch mixture.  Stir in coconut and sour cream.

  3. Cover and chill at least 8 hours.
Coconut-Cream Cheese Frosting
 Beat 2 (8-oz.) packages cream cheese, softened and 1/2 cup unsalted butter, softened, at medium speed with an electric mixer until creamy.
Gradually add 2 cups powdered sugar, beating at low speed until blended.  Increase speed to medium, and beat in 1 Tbsp. cream of coconut and 1 tsp vanilla extract until smooth.


Don't forget to come back October 3rd thru October 9th for the Pretty Packages Party!


The Blackberry Vine

Tuesday, September 21, 2010

Lemon Birthday Cake

~LEMON BIRTHDAY CAKE~
Lemon cake with layers split and filled with lemon curd and butter cream.  Lemon Swiss Meringue Buttercream was used to frost and decorate cake.  So light and rich at the same time!
Yummy!
This cake was also delivered with 40 German Chocolate Cake Balls...no pictures as I've shared them here before.

Don't forget to come back October 3rd thru October 9th for the Pretty Packages Party!

The Blackberry Vine

Monday, September 20, 2010

Birthday Banner

This weekend a friend's husband had a surprise 39 1/2 birthday party for her (he knew she would be expecting one for her 40th, but not for her 39 1/2!)  Two other friends were is charge of coordinating everything, and I was in charge of the cake.  I also offered to make a banner.  I've been wanting to try the paper banners that I've been seeing around blogville.  It takes a little longer than one might think.

I used three different patterns of gray paper.  You can get 3 "triangles" out of each 12 x 12 piece of paper.  My cricut came in very handy for all of the letters and scalloped circles.  I used black & silver glitter papers for the letters, cutting them from the "Storybook" cartridge.  Pink crepe paper was added to the back of the zebra scalloped circles using hot glue.  Hot glue was used again to affix the rosettes to the triangles.  The holes were punched with a 3/4 " hole punch.  The cute ribbon was a find at Hobby Lobby.  The pink crepe rosettes were highlighted with silver and pink glitter...all in all very girly and festive.  Next time I would use a pink scallop circle behind the lettering as the zebra stripes make it difficult to read.
Happy 1/2 Birthday My Friend!!


Don't forget to come back October 3rd thru October 9th for the Pretty Packages Party!

The Blackberry Vine


The Girl Creative
Sumo Sweet StuffKeeping It Simplemmm button

Making


BWS tips button


Wednesday, September 15, 2010

Castle Cake

Castle Cake

This cake took the longest for me to create and the results were less than stellar. 
Putting the cake together took some time, but seemed to look pretty good prior to frosting.  (I used butter cake...next time I will use a pound cake as this cake became so soft as it thawed that one of the turrets started to lean...augh!!)
Next I put on the crumb coat...it was a little difficult with all of the corners, but not so bad.  Things are looking good at this point.
Then the next morning I started to frost & decorate.  To my horror, the buttercream icing began taking on a lavendar color the more black paste I added to it...and of  course, I kept adding more thinking, "this time, it will take on a dark gray color."  It didn't.  I flipped.  THIS IS A BOY'S CAKE!!  He would not be interested in a purple cake....and I'm running out of time. 
Well, I just went with it and changed my decorating plan.  After covering the entire cake in this awful purplish frosting, I decided to just lightly add a touch of black to the buttercream and make light gray stones for the castle.  This looked better, though this is the point where I noticed one of the turrets starting to resemble the Leaning Tower of Pisa...aughhh!  If it was my kid's cake, it would have been fine, but I was making this for a friend AND she was paying me.  Panic started to take hold.  I was afraid I would run out of frosting (luckily I had plenty.)
Well, I got it done, added some grass and pennants and took a look.  Not too bad.  Until I realized there was NO DOOR!!!  I became so distracted by the purple frosting that I totally forgot to leave room to create the door.  Have I lost my ability to make cakes?!?  Maybe this was a sign?  Luckily the mom showed me LOTS of grace.  She was going to decorate around the cake with Lego knights and she happened to have a Lego drawbridge door she could press into the side of the cake.  I haven't seen pictures yet, but my fingers are crossed it all turned out ok.  At least I know it tasted good!

Smiles!

Tuesday, September 14, 2010

Mario Party Ideas

Ok, you must see these cute ideas from a Mario Party we attended this weekend.  They were created by my friend Jennifer for her son AJ's birthday party.  It was held at Chuck E. Cheese, but that did not deter her rom throwing a theme party (I LOVE IT!!!) 

She made these cute Mario hats.  (Don't you love my hurricane hat model?!?  Thanks MIL!!)  She used cardboard and elastic string.  Not sure if she had a template she used or if she created it herself.  If she has one, I'll see if she'll let me add it to this post.

Besides being so cute, the hat and mushroom bag had practical purposes as well. It was much easier to locate a child attending AJ's party from the mass of children because of his Mario hat (and mustache!!) I forgot to tell you, she also had those cute stick on mustaches for the boys to wear! (AGAIN, LOVE IT!!!)  Wish I had taken my camera to the party...Haden looked so cute with that mustache and hat on!

These SUPER CUTE felt bags held the gold coins (like on Mario,) the tickets and few sweet treats to keep the fun going.  The boys hung them around their neck to keep everything close at hand.  Fabulous idea!  If you have a party at Chuck E. Cheese I would highly recommend doing something similiar that fits your theme.  Having these little pouches made the party easier for EVERYONE!

Admittedly, I didn't get into the treat bag until the next day.  (We had a BUSY weekend and I just didn't have the energy to say, NO CANDY BEFORE BED!)  Wow!  Was I surprised when I opened it.  (Yes, you're reading it right...I opened it.  I always have to see if there is any candy I want first!)
Do you see that Mario Pop she made?!?  All paper pieced together!  So cute and clever!!  I didn't ask where she found her ideas....she's so clever and cute she probably just came up with everything!! 

Moral of the story, even if your child INSISTS on having a party at a venue other than your home, you can still throw an amazing, memorable theme party that children and parents alike will all enjoy! 

Great party, Jennifer!  So glad we were able to be a part of it!

Smiles!!

***UPDATE***
Here are some links I've found for templates:
Invitations, Party Ideas & Tag Template, Pinata, Star Coin Decorations, Lots of Ideas

Follow Me on Pinterest

Sunday, September 12, 2010

Pretty Packages Party #2 Highlights

Hi Friends! Its been such a crazy week here, I've been MIA at my own party!  So sorry!  I promise I'll stop by and comment on each and every idea this week.  I loved seeing all the pics!

Also, I heard the link button didn't always work.  I'll work on that this month so it'll be ready by the next party.  Any tips would be appreciated!

 Thanks to everyone who linked up to this month's Pretty Packages Party.  There were so many amazing ideas!  It is always so hard to pick out a just a few to highlight.  Here are a just a few of the super cute ideas you wonderful gals shared this month:


Tie Party Favors by Bliss Bloom Blog

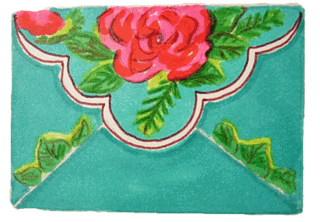
One of a Kind Envelopes by In My Own Style


Thursday, September 9, 2010

Chocolate Almond Croissants

Oh!  It's been a busy week!  I have two cakes due this weekend and cake balls today.  There was also a little event at J's school and I was asked to bring a pastry.  Well, I made apricot strudel and these yummy little Chocolate Almond Croissants.  They are quick to put together but need time for the chocolate to firm up (about 3 hours.)  I put them together around 5:30 yesterday morning and they were perfect by the time J's party started at 9:15.  Again, these are so easy and yummy I just had to share the recipe with you!

Chocolate Almond Croissants

 1  (12.5 oz) can almond filling (this has a color similiar to pecan pie filling...not pale like almond paste)
12 - 20 small croissants (I used the ones from Sam's bakery dept...frozen will also work)
1 cup semi-sweet chocolate morsels, melted*
1 cup sliced almonds

Toast almonds and set aside.  Split croissants.  Stir almond filling and spread about 2 tablespoons of filling on croissant bottom.  Cover with tops.  Place on parchment lined pan.  Bake at 325 degrees for about 7 minutes or until lightly toasted.

Drizzle or spread chocolate on top of croissants.  Sprinkle with almonds.  Leave at room temperature until chocolate sets...about 3 hours.

*To melt chocolate morsels:  Place in microwave-safe bowl;  microwave on HIGH 1-2 minutes or until melted.  Stir only once.  (Start at 1 minute...you don't want it to burn)

Smiles!

PS.  Don't forget to stop by the Pretty Packages Party!


Sunday, September 5, 2010

Pretty Packages Party #2


Well it's the first full week in September already.  Kids are back in school.  The weather is getting cooler.  (At least it is here!  We've gone from the 100's to the high 80's low 90's...it's glorious!)

I was browisng around blogland and saw this post from Blake Ramsey with Martha Stewart's Craft Department.  Click here to read post.  They used everyday office labels and dots to decorate plain wrapping paper.  Of course I adore her choice of wrapping paper color...very Martha.

Now its time to share your wrapped packages!
This is a PRETTY PACKAGES PARTY so what I'm looking for is beautifully, interestingly, creatively wrapped gifts. The gifts could range from individual gifts, to party favors, to food gifts. At the end of the week (if I can wait that long,) I'll chose my favorites to share with everyone.


Please be sure to add your permalink below, and not your general blog address. To get your permalink, click on your post name, then just copy and paste the address that shows up in the address bar at the top, into the "url" box for the picture linky. You'll also need to put your e-mail address in, but don't worry, it will not be visible to anyone.

It would be fantastic if you would include the Pretty Packages Party button in your post, to make it easy for others to find your Pretty Package post. To do that, just copy and paste the Pretty Packages Party button to your computer or grab the html code from underneath the Pretty Packages Party button on my sidebar.

Please include a link in your Pretty Packages Party post back to the host blog, The Blackberry Vine. Why is this important? When you include a link back to The Blackberry Vine, it ensures your regular readers/visitors will find the other gorgeously wrapped gifts linked to the Pretty Packages Party. If everyone links back, this maximizes the opportunity for visits for all who participate.

Please do not add your link below, until your Pretty Packages Party post is actually published to your blog. Another helpful hint...DO NOT type in all caps...it makes it very difficult to read! Thanks!

Last, but certainly not least, please comment on the post in front of you and behind you...spread the comment love!

Smiles!

LinkWithin

Related Posts with Thumbnails